| Bad Ice-Cream 2 | ← | Plunger | → | Super Stock Take |
Plunger is an action-puzzle game released on January 22nd, 2013. The player controls Plunger, a robot with long arms that has to reach the finish lines of each level while avoiding enemies.
Controls[]
Flash[]
 Up and down arrow keys - Move vertically
- Left and right arrow keys - move horizontally
Nitrome Touchy[]
- When vertical: tap left/right - move left/right
- When horizontal: tap up/down - move up/down
Levels[]
There are twenty-four levels. In each one, the player must go around an area resembling a temple, and connect nodes in lines with their rope in order to make them golden.
Gallery
|
")
")
")
")
")
")
")
")
")
")
")
")
")
")
")
")
")
")
")
")
")
")
")
")
Level 1[]
Plunger is situated in the centre of the level, with the ropes oriented horizontally. Two brick birds fly vertically, contained within rectangular alcoves. Nodes are found on the left and right sides, oriented vertically.
The player is not required to interact with the brick birds and can reach the nodes by navigating and attaching the plunger's ropes to the larger blocks.
| Click [show] to see this video |
|---|
 |
Level 2[]
This level introduces keys and fire nodes, the latter of which borders the entire outer portion of the stage. There is only one pair of nodes the player has to reach to complete the level, found near the bottom.
The plunger starts in a boxed in area, where they are required to grab the key within the L shaped barrier. Once the key is retrieved, the player exits from the top and can navigate their way around to reach the nodes. The switching of ropes may be necessary to prevent the fire from reaching the plunger's body.
| Click [show] to see this video |
|---|
 |
Level 3[]
This level introduces eater nodes and turrets. Five eater nodes are arranged stepwise on the bottom left corner of the screen, just above Plunger. Another set of five eater nodes are arranged in a vertical line at the top left of the screen, just to the left of a key. Adjacent to the key is the turret; below the turret is the locked door leading to the finishing nodes. The player starts in the bottom left corner in an alcove below the bottommost eater nodes.
The player must collect the key, inevitably attaching themselves to one set of eater nodes in order to pick it up. They must then avoid the turret's bullets as they come into view with the turret on their way down to the finishing nodes.
| Click [show] to see this video |
|---|
 |
Level 4[]
The open area of this level is cross shaped, with the four nodes connecting to form a rectangle, joining at the inner corners. At the centre of the nodes, there is a block with four turrets, one on each corner. Plunger starts at the bottom of the level, ropes oriented horizontally.
When the level commences, the turrets closest to the Plunger immediately start firing in the character's general direction. The player must move the Plunger without hesitation to avoid having its body be hit by the fireballs.
| Click [show] to see this video |
|---|
 |
Level 5[]
Two rectangular shapes are situated in the middle of the level, on atop the other. The one at the top is outlined by three finishing nodes, bordered by locked blocks with an opening at the top. Below this shape is a smaller rectangle with an opening at the bottom. A key is contained inside it. Plunger starts oriented horizontally within the middle of the largest rectangle. Two brick monsters walk along the blocks, one on each rectangle.
The player should move Plunger out from the top and retrieve the key from the smaller area when a brick monster is not inside. This will cause the locks to dissolve and the enemies to fly to the borders of the level. Afterwards, the player can move Plunger upwards near the starting point so that they can attach the ropes to each of the three finishing nodes.
| Click [show] to see this video |
|---|
 |
Level 6[]
This level introduces the power pill. Its path is outlined in a clockwise spiral shape and leads to a pair of finish nodes at the end. Multiple flying brick monsters are present in the passageways. There are four power pills present, two on the outermost passage on the right at the top and bottom, one on the outermost passage on the top left corner and one at the bottom right corner within the inner passageway. Plunger starts in the top-right corner of the level at the beginning of the spiral and is oriented vertically.
The player must move Plunger's ropes horizontally to break free of the beginning blocks and move into the spiral. As they follow the path, Plunger should automatically pick up the power pills. Players should move Plunger constantly along the passage as to not lose the power pill's effect while navigating past the flying enemies.
| Click [show] to see this video |
|---|
 |
Level 7[]
Four pairs of nodes form a clockwise windmill shape in the centre of the area. One node from each pair is part of the corner of a smaller square that has two brick nodes bordering each side. There are eight brick birds placed around the level, half which fly horizontally and the other half flying in a vertical motion. The horizontally flying brick birds turn when they hit the end of the nodes protruding from the top and bottom of the screen. The vertical flying creatures will turn in the opposite direction when they hit the protruding nodes on the sides of the screen.
Plunger starts this level at the bottom, horizontally oriented. If the player keeps Plunger in the starting position for too long, the vertically flying brick birds will land on the ropes and attack Plunger. The player can use the brick nodes to kill the brick birds, but it is still possible to complete the level by focusing on connecting the finish nodes and switching orientations if a brick bird attaches to the ropes.
| Click [show] to see this video |
|---|
 |
Level 8[]
Plunger is contained inside a large square with brick blocks covering the corners with a set of three or four bricks extending from each side of the corner. Between each brick covered corner is a pair of finish nodes, with four in total. Four turrets are attached to the middle of each side of the outer walls. Plunger starts with the ropes oriented horizontally and has four rectangular blocks that form a makeshift barrier in the shape of a square with its corners cut off.
When the player moves into view of the turrets, they will turn to face Plunger and fire a bullet. They should move Plunger to avoid having the bullets touch the character's body and be prepared to switch the orientation of the ropes if a bullet lands on there. If players touch too many sets of brick nodes, they may reduce the amount of space they have to dodge bullets. Players should maneuver to the outside portion of the square if they activate brick nodes that prevent them from crossing over to attach Plunger's ropes to a pair of nodes.
| Click [show] to see this video |
|---|
 |
Level 9[]
This level introduces ice blocks, which are situated in the middle of the level in a square shape with indents on each side. A pair of nodes is found near each indentation. Four brick monsters move along the edge of the level in a counter-clockwise direction. Plunger starts this level oriented vertically within the topmost indentation of the ice block shape.
Positioning Plunger onto each of the nodes requires touching the ice blocks to align Plunger. At the same time, players should be wary of the enemies walking along the edges and avoid touching ice blocks when trying to reach the next set of nodes. The player should weave along the outside of the ice blocks and not touch them unless they are trying to align Plunger with a pair of nodes.
| Click [show] to see this video |
|---|
 |
Level 10[]
This level four sets of six rocket nodes that placed together in a row or column. Two are aligned on the sides near the corners of the area, while the others are aligned on the ground or ceiling close to the side-positioned rockets. All rocket nodes fire simultaneously away from them, and their overall direction moves in a counter clockwise direction. Nodes are found parallel to each set of rocket nodes and one from each pair of the finish nodes has a green block attached to either side of it.
Plunger is positioned in the centre of the area horizontally, and upon entering the level, the rocket nodes will start to fire periodically. Players should ideally follow the general counter-clockwise motion of the rockets and make note of the corners and outermost edges where rockets do not pass. They can move to these edges and continue travelling counter clockwise to reach each of the nodes, being careful not to run into any of the rockets that fly past.
| Click [show] to see this video |
|---|
 |
Level 11[]
There are four pairs of nodes in the centre of the level, forming a cross shape. One node is shared by the four pairs in the middle. Close to the outermost nodes is an L shaped block which is oriented differently depending on where it is placed. A turret is positioned at each corner. Plunger starts with ropes vertically aligned above the bottom-left turret and closely underneath the L block. The turret in the top-left corner automatically begins to fire when the level commences, but its bullets are blocked by the L shape.
Players are required to move Plunger rapidly as the turrets start to fire immediately when Plunger is in their view. As the player attaches the ropes to the nodes, they must watch out for the incoming bullets so that they do not hit Plunger's body or land on the ropes for too long.
| Click [show] to see this video |
|---|
 |
Level 12[]
The area is divided into four sections, each with three nodes and a bubble. One of the three nodes is placed at the corner, with the other two nodes extending in two different directions perpendicular to each other along the edge of the level. Plunger starts in the middle of the level, ropes placed horizontally.
As Plunger moves around the level, players should be careful of where they place Plunger's ropes. Any bubbles must avoid touching Plunger's body, but can be completely eliminated if Plunger is able to pop their split forms. Focusing on popping the bubbles may be time consuming, so players should avoid bubbles and aim to attach Plunger's ropes in each of the sectors if they wish to optimise their score.
| Click [show] to see this video |
|---|
 |
Level 13[]
This level is divided into three sections, with a pair of nodes on either side at the bottom. A row of sixteen eater nodes lines the bottom of the largest sector, where Plunger starts oriented horizontally just above them. Five rocket nodes are found above Plunger, three attached to the left wall and two attached to the right.
Each side of the wall in the section which Plunger starts in ends with an invisible barrier that the player can pass through but enemies cannot. Both of the smaller sectors are nearly identical to each other in that they have a row of six eater nodes at the top, with a brick monster wandering within each of the barriers. The only differences are that the brick monster on the left moves counter clockwise while the other clockwise, and pair of rocket nodes attached to the ground fire upwards in the right sector.
As the player attaches to the eater nodes while climbing upwards, they are required to orient Plunger sideways periodically to avoid being pulled down. At the same time, Plunger must evade rockets that fly across on the ascent to each of the sectors. The player should avoid orienting the ropes vertically on the same side that a brick monster walks along, if it is also moving in a vertical direction. Rather, players should move along the opposite edge on their way down to the nodes, being careful not to attach the ropes horizontally when the brick monster is positioned next to them. In the right sector, players should be wary of the ascending rockets and keep to the edges when making their descent.
| Click [show] to see this video |
|---|
 |
Level 14[]
This level introduces the plus and minus nodes. Six pairs of them need to be attached to in order to open three barriers. One leads Plunger out of the starting area (to which Plunger is aligned horizontally). Another unlocks a smaller area to the left of where Plunger starts and contains a key that unlocks a subsection containing a pair of nodes. To the right of this subsection is another pair of plus and minus nodes which have to be attached to in order to access a pair of nodes. There are two spawners which emit bubbles every few seconds. One is found near the top left corner, the other on the bottom right. A long pair of nodes lies in the middle plane.
The player should attach to the plus and minus nodes at the bottom of the area to retrieve the key. They can then make their way up to the unlocked nodes as well as the nodes locked by the plus and minus barriers. Along the way, the player should have Plunger attach to the longest set of nodes in between the two spawners. If possible, they should avoid popping bubbles and having them touch Plunger's body.
| Click [show] to see this video |
|---|
 |
Level 15[]
Brick nodes entirely cover the ceiling of this level, with eater nodes aligned in alternate formation along the walls. The four pairs of nodes are found at the top in a column and are parallel to each other. Plunger starts at the ground, oriented horizontally. The entire ground does not contain any hazards.
In this level, the player is required to make their ascent to the nodes while red bricks from the brick nodes travel downwards. At the same time, players must be careful when attaching to the walls, since each attachment, aside from the nodes, forces Plunger to attach to an eater node. The player should only orient Plunger to the side to evade the red bricks, and try to aim for a precise attachment of the nodes. Once Plunger is attached to a set of nodes, the player can wait for the bricks to fade away so that the ropes fully extend across. The player should move Plunger sideways as soon as they align their ropes with the nodes to avoid being hit by the bricks.
| Click [show] to see this video |
|---|
 |
Level 16[]
This level is divided into two main sections, separated by barriers locked by plus and minus nodes. The bottom section splits into two thin U shaped sectors, each leading to a vertically aligned set of nodes. Two brick birds are found in this bottom section, flying up and down the passage that is parallel to the pair of nodes. There are two brick monsters that wander along the edges of the section.
Above the barrier, a rectangular section also contains two pairs of vertically aligned nodes. Each node is attached to a rectangular block with a brick monster walking around it. Two brick monsters walk in opposite directions along the edge of the area, with two brick birds that fly above the ends of the barrier connected by the plus and minus nodes.
The player can activate a plus and minus node and continue to either the left or right to reach the bottom two nodes while watching out for enemies. After connecting the nodes successfully, Plunger can then move to the upper half of the level to connect the ropes to the last two pairs of nodes. The player should be aware of the brick monsters that circle the green blocks where the nodes are attached to, as attaching the ropes when the brick monsters are on the nodes will cause them to immediately move on the ropes towards Plunger's body.
Alternatively, the player can activate the plus and minus nodes and connect the ropes to the upper section nodes, then the bottom. Players may risk changing the pattern of the brick birds on their way up, which can increase the chance of an enemy attaching to Plunger's ropes.
| Click [show] to see this video |
|---|
 |
Level 17[]
Plunger starts in the middle of the area, aligned horizontally and surrounded by four blocks. The two blocks above and below Plunger are rectangular with a square shape protruding out in the middle of the side closest to Plunger. The other two, which Plunger's nodes rest on, have a small square indent on the sides facing away from Plunger. Both these blocks have a Power Pill inside them.
There are four nodes, each parallel to the edges of the level and blocks which Plunger starts on. Near the corners are four spawners, two which spawn fire monsters from the top-right and bottom-left corners, and the other two which spawn ice monsters. Unlike most of the previous levels, Plunger does not start attached to locked blocks.
At the start of the level, the player can attempt to attach their ropes to one of the side nodes first before reaching the Power Pill. If they move immediately, Plunger should have enough time to attach the ropes before the four monsters are spawned simultaneously. Following this, Plunger can immediately obtain the closest Power Pill, then proceed to either the top or bottom nodes. Once Plunger has attached to the next pair of nodes, the player can collect the final Power Pill and attach to the last two pairs of nodes.
Alternatively, the player can immediately obtain the Power Pill and dodge the spawning fire and ice monsters once its effects wear off. If the player lingers for too long, Plunger will risk being hit by the monsters that move around in the area.
| Click [show] to see this video |
|---|
 |
Level 18[]
This level is divided into nine sections, each determined by the points of the purple nodes. There are at least four laser nodes for each section, allowing Plunger to create lasers both horizontally and vertically. At the bottom-left and top-right sectors, a spawner produces fire monsters into the area. Four pairs of nodes are found on the outermost edges, in the middle sector of each edge. Additionally, four brick monsters move in a continuous direction along the edges.
Plunger starts this level in the middle of the sector, within a cross-shaped barrier that has four brick monsters walking around it. There are four gaps that Plunger can pass through that enemies cannot.
Players need to be able to attach to the four sets of nodes without being hit by the enemies. Using the purple nodes, Plunger can generate lasers that provide defense from enemies. The player should watch out for the continuously spawning fire monsters, especially when moving near a spawner.
| Click [show] to see this video |
|---|
 |
Level 19[]
Plunger starts in the centre of a rectangular enclosure closed off by plus and minus nodes at the top and bottom, which is also inside another rectangular enclosure closed off by plus and minus nodes on the sides. Two sets of nodes are found at the top and bottom within this area, along with two longer sets of nodes found at the top and bottom-most parts of the levels. The only enemies found in this level are brick monsters, four which walk simultaneously around the borders of the level and the two rectangle barriers. A brick monster wanders around each node on the outermost part of the level.
Players must be able to activate the plus and minus nodes while avoiding the walking brick monsters. Only one side of the nodes is necessary to open in the second enclosure, though opening both gives the brick monsters and Plunger more paths to move around and evade the monsters. In some cases, allowing brick monsters to travel on Plunger's ropes can help to move enemies to the other side of the area and prevent them from being too close together and near Plunger.
| Click [show] to see this video |
|---|
 |
Level 20[]
This level is mostly composed of a zigzag path with multiple red brick nodes and ice spawners as the hazards. Plunger starts the level in a nook at the top left corner. A corridor just above Plunger has a column of five red bricks making up the walls at the far right. The path descends and goes to the left, where another column of five bricks are lined at the wall.
The player should travel down a C-shaped corridor to the bottom area, which contains an ice monster spawner at the bottom left corner and a column of four red brick nodes on the far right. The four brick nodes outline the path to a thin vertical pathway with a row of three bricks at its end. This path directs to the player's left, where the pair of vertical nodes is present.
To avoid being crushed by the bricks, players can move Plunger to the ceiling, then make their way across the ropes, moving down by one or two brick increments as the bricks move rapidly in the opposite direction. Once they reach the area with the spawner, players can wait for the spawning ice monsters to freeze Plunger's ropes to reduce the number of ice monsters currently in the area. Then Plunger can attach to the bricks on the right and immediately move upward to avoid being frozen.
If the player ascends and does not have enough room to make it to the nodes, they should align the Plunger horizontally and move to the side that does not have bricks descending down it, so that the other activated nodes can deactivate without crushing Plunger. As with the previous sets of brick nodes, the player should make their way up while moving in increments to the side so that Plunger can reach the finishing pair of nodes.
At any point during the paths with brick nodes, the player can orient Plunger perpendicular to the direction of the moving bricks to get out of the way if they find that they have activated too many brick nodes at once.
| Click [show] to see this video |
|---|
 |
Level 21[]
This level is an almost entirely open area, consisting of four pairs of finish nodes. Two are horizontal and placed near the top-left and bottom-right corners, while the other two are vertical and placed near the top-right and bottom-left corners. The entire border of the level is made up of brick nodes, with Plunger starting oriented horizontally in the centre.
Aside from being aligned with the nodes, Plunger is always vulnerable to being crushed by bricks in this level. Since bricks can travel from either side of the rope if Plunger aligns between two brick nodes, the player can consider attaching to a brick and the outer side of a node to reduce the risk of being hit. After attaching to a set of nodes, players should move Plunger completely to one end of the nodes to let the activated bricks crumble. Players should also try not to activate too many brick nodes on their way to the nodes, as this can, in turn, increase the risk of Plunger being crushed by the bricks due to the amount of evasion space being reduced.
At least one end between each space of the finish nodes allows Plunger to attach to the outer part of another finish node, allowing them to only activate one line of brick nodes at a time.
| Click [show] to see this video |
|---|
 |
Level 22[]
There is a square in the middle of the level, with each of its corners being part of a set of nodes. The nodes travel straight outward, causing the pairs to form a pinwheel shape. Each floating node has a brick monster wandering around it counter-clockwise, while four brick monsters walk around the edge of the square shape in a clockwise direction.
Plunger's ropes risk having a brick monster run across it whenever players attach to the square. Players can use this to move brick monsters off the square or nodes and onto the outer edges of the area, where they can be evaded at a farther range. If careful timing is used, players can avoid having brick monsters latch onto Plunger's ropes at any point during the level.
| Click [show] to see this video |
|---|
 |
Level 23[]
Plunger is placed in the centre of a mostly open area, perpendicular to the pair of laser nodes attached on the far sides of the wall. Directly above and below Plunger are two turrets, one on the top and bottom. A set of nodes are placed in between the wall and turret, aligned horizontally. There are four in total and are surrounded by locked blocks. An ice monster spawner can be seen below the top-left pair of nodes and above the bottom-right. Below the top-right set is the key.
Unlike turrets in the previous levels, the turrets encountered here are wider and shoot bullets with a more precise aim. For defense, the player can attach Plunger's ropes to the laser nodes in between reaching the finish nodes to eliminate the ice monsters and bullets that are spawned into the area. By staying attached to the laser nodes, the player can have its effects remain permanently on Plunger's ropes until Plunger detaches from them.
The player must be cautious when aligning their ropes vertically, since they may cross the path of the spawners and cause Plunger's ropes to freeze. Any hazards that land on Plunger's ropes are also not destroyed when they cross through a laser barrier. Players should watch the ice spawners and move away from them where possible before they spawn an additional ice monster.
| Click [show] to see this video |
|---|
 |
Level 24[]
This level is entirely bordered with ice and fire nodes. Ice nodes occupy one half of a border on one side while the fire nodes occupy the other half. The two sets alternate around the area. There are four sets of nodes which Plunger must attach to, all which are parallel to the fire nodes and perpendicular to the ice nodes. Plunger starts in the middle of the level, ropes aligned horizontally.
When Plunger aligns its ropes, they will most likely be attached to a fire node on one side and ice node on the other. This causes Plunger to freeze temporarily while a spark is sent down from the end which the fire node was attached to. In order for Plunger to reach a set of nodes, the player can attach Plunger's ropes vertically and move away from the direction which the spark travels. The player should then align Plunger with the end of the nodes aligned horizontally at the top and wait for the ice to break.
Upon being able to change directions, the player should align Plunger's ropes horizontally. This should cause one of Plunger's ropes to be attached to the end of a node while the other is attached to a fire node, allowing the player to move in towards the set of nodes without being frozen. The player can repeat this process, positioning Plunger so that they can attach Plunger's ropes to the end of one node and the other to a fire node, and attach to the corresponding finish nodes before the spark reaches Plunger's body.
| Click [show] to see this video |
|---|
 |
Ending[]
|
This navigational box contains a spoiler. Click [show] to open the box. | |
| Plunger is seen hugging two enemies and saying, "Hey! Let's not fight. Let's all be friends. :)".
| |


Enemies[]
An enemy's behaviour is affected upon either contact with Plunger's body or the ropes.
- Brick birds - Fly vertically or horizontally in repetitive motion. They move towards Plunger's body upon attaching to the ropes.
- Brick monsters - Walk around clinging walls or other surfaces in a continuous direction. Like brick birds, they move towards Plunger's body upon attaching to the ropes.
- Ice monsters - Smaller enemies that freeze Plunger's ropes much like ice nodes. They kill Plunger if they attach to Plunger's body.
- Fire monsters - Cause a spark to travel towards Plunger's body upon contact, which disappears when Plunger changes directions. This behaviour is similar to that of turret bullets.
Interactive objects[]
- Nodes - Elicit an effect when attached.
- Regular nodes - Attachment within the dotted lines is necessary to completing a level.
- Ice nodes - Briefly prevent Plunger from changing the orientation of the ropes when attached to.
- + and - nodes - Open certain barriers when either side has been attached to.
- Power pills - Allows Plunger to be briefly invincible, destroying any enemy or hazard with its body or ropes.
- Lasers - Activated by a pair of laser nodes, this causes a temporary barrier to form between the two nodes that can kill enemies and destroy bullets.
Hazards[]
- Fire nodes - Send a spark towards Plunger's body when attached.
- Eater nodes - Pull Plunger towards them; their pull eventually becomes stronger than Plunger's movement.
- Rocket nodes - Fire rockets that can travel through Plunger's ropes and kill Plunger on contact with its body.
- Bubbles - Split into two bubbles when a rope goes through them. They harm Plunger's body on contact.
- Turrets - When Plunger is in their view, they fire a bullet towards the character.
Glitch[]

Plunger level completion freeze glitch
Playing levels 2, 4 and 12. After R is pressed on the completion screen, all subsequent playthroughs freeze.
- There is a glitch in Plunger that causes brick monsters to rotate in the air and not move. They will begin to move again when a rope touches them.
- Pressing R to restart as soon as Plunger is killed by a fire monster will cause its death sound effect to be looped several times as the level is loaded.
- If the player presses R to restart a level they have completed on the level completion screen, beating the level again may cause the screen to freeze and the level completion will not reappear. The cog remains functional, allowing the player to return to the titlescreen by selecting "Quit". Any subsequent levels they choose may also freeze once the glitch is initiated. The level complete screen will reappear if Plunger dies and the player reloads the level using the space bar.
Nitrome Touchy[]

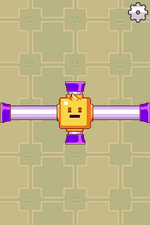
The control interface of Plunger.
Plunger was made Nitrome Touchy compatible upon release. The screen displays the plunger at about the same resolution as on the titlescreen. In order to control the plunger, the player must move their finger on the screen in the same direction they want the plunger to move. Alternatively, players can also tap in line with one of the plunger's nodes and hold to control its motion. The plunger will slide towards the direction that was last swiped or tapped and held until the direction is changed or the screen is no longer being touched.
Plunger is one of the Nitrome Touchy games to have its ending displayed on the device screen, as well as within the browser.
Trivia[]
- All the game's style (character, enemies, environment) could resemble LEGO bricks - particularly, the plunger's head resembles that of a LEGO minifigure.
- If the Flash version of Plunger is completed, the ending image that is displayed is a .jpg, while the Nitrome Touchy ending displayed is a .png.
- Upon release of Nitrome.com 2.5, Plunger was the least hearted Nitrome game.
| v • d • ePlunger | |
|---|---|
| General | Plunger • Plunger (character) |
| Enemies | Brick birds • Brick monsters • Fire monsters • Ice monsters |
| Hazards | Eater nodes • Brick nodes • Fire nodes • Ice nodes • Rocket nodes • Turrets • Bubbles • Spawners |
| Interactive objects | Nodes • Power pills • Regular nodes • Laser • + and - nodes |