| Rustyard | ← | Final Ninja Zero | → | Powerup |
Final Ninja Zero is a shoot 'em up platform game released on April 8, 2009. The game is the prequel to Final Ninja, and takes place chronologically forty years before the first game. This game was made a distributable game on May 9th, 2012 and an HTML5 port was released during the time period of June 10th - August 12th, 2021[1].
Controls[]
 Left and right arrow keys - Move or swing the ninja rope
- Up arrow key - Jump or move up on ninja rope
- Down - Activate stealth mode or move down on ninja rope
- Mouse - Throw a ninja star (click and hold to throw a ninja rope for upward movement without a wall)
- Spacebar - Exit out of controlling a green mine
Levels[]
0: The Dock[]
| Incomplete section
This section is incomplete. You can help by adding the missing info. |
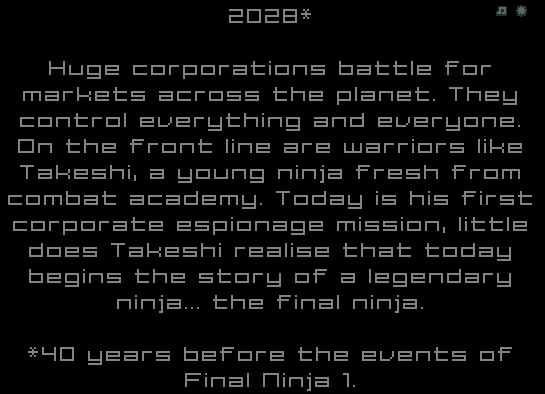
The prologue to the game, Takeshi has invincible samurai guards accompanying him as he runs across the dock against many S.W.A.T. units. At the end of the level, the player is zapped by Maxwell Merlock and put into a holding cell.
| Click [show] to see this video |
|---|
 |
1: Holding Cell[]
| Incomplete section
This section is incomplete. You can help by adding the missing info. |
This level introduces the player to the basics of the game. It introduces the ways to move the character, drone mines and the sushi to regain health.
| Click [show] to see this video |
|---|
 |
2: Security Grid[]
| Incomplete section
This section is incomplete. You can help by adding the missing info. |
This level introduces trip wire lasers. Since there are many trip wire lasers, the level also teaches the player to utilize stealth. A few stray drone mines are also encountered throughout.
| Click [show] to see this video |
|---|
 |
3: Barracks[]
| Incomplete section
This section is incomplete. You can help by adding the missing info. |
This level introduces the orange laser beams, which turn on and off periodically. It also introduces the SWAT unit robots.
| Click [show] to see this video |
|---|
 |
4: Restricted Area[]
| Incomplete section
This section is incomplete. You can help by adding the missing info. |
This level introduces the usage of force fields, which the player needs to destroy the generator in order to disable the force field. Also, a major topic for this level is wall sliding and climbing techniques which are useful in areas with electrical walls.
| Click [show] to see this video |
|---|
 |
5: Warehouse 1[]
| Incomplete section
This section is incomplete. You can help by adding the missing info. |
The first part of the level introduces the moving blocks which could help transport Takeshi but could also squash him if the player gets careless. The second part introduces the player to sentinel guards.
| Click [show] to see this video |
|---|
 |
6: Warehouse 2[]
| Incomplete section
This section is incomplete. You can help by adding the missing info. |
This level involves many sentinel guards in which Takeshi has to navigate through. There are also lots of areas with electrical walls, which restrict rope movement.
| Click [show] to see this video |
|---|
 |
7: Communications[]
| Incomplete section
This section is incomplete. You can help by adding the missing info. |
This level introduces rotating guns, which can be destroyed, unlike fixed cannons. Two sniper units are also introduced in this level as well as cables that hide Takeshi from them.
| Click [show] to see this video |
|---|
 |
8: Lab Area 1[]
| Incomplete section
This section is incomplete. You can help by adding the missing info. |
This level introduces the green mines, which the player has to use to control it in order to access an out-of-reach area to destroy a generator. It also introduces the clone scientists which trigger the alarm when they spot Takeshi.
| Click [show] to see this video |
|---|
 |
9: Lab Area 2[]
| Incomplete section
This section is incomplete. You can help by adding the missing info. |
This maze-like level involves using stealth orbs multiple times to get through various areas with large numbers of clone scientists. Around the end of the level, the player has to chase Dr. Boshi through an area heavily guarded by mines. In the end, the player is attacked by Maxwell Merlock and gets placed onto a service lift.
| Click [show] to see this video |
|---|
 |
10: Service Lift 1[]
| Incomplete section
This section is incomplete. You can help by adding the missing info. |
Takeshi's first battle with Maxwell Merlock occurs in this level. The player has to shoot at the boss while avoiding the chains of energy orbs the boss shoots towards the player. The player also has to be careful not to fall off the elevator.
| Click [show] to see this video |
|---|
 |
11: Storage Basement[]
| Incomplete section
This section is incomplete. You can help by adding the missing info. |
This is a level heavily guarded by cutting lasers. Because of these lasers, this level is tricky and requires very precise timing in order to complete. In the end, the player has to climb a wall with the cutting lasers moving up and down the wall.
| Click [show] to see this video |
|---|
 |
12: Simian Unit Test Area[]
| Incomplete section
This section is incomplete. You can help by adding the missing info. |
This is a rather short, but tricky, level. In the beginning of the level, it introduces the cyborg monkeys, which can be tricky to navigate through. The second part of the level involves sentinel guards with cutting lasers, which cannot be destroyed with ninja stars, so the player has to control a green mine and carefully navigate it to the guards to destroy them.
| Click [show] to see this video |
|---|
 |
13: Clone Laboratory[]
| Incomplete section
This section is incomplete. You can help by adding the missing info. |
This level requires speed because just like Level 9, the player has to use stealth orbs to navigate through many areas with multiple clones. At the end of the level, the player has to find and kill Victor Boshi, which would render the Force Field blocking the Exit no longer disabled.
| Click [show] to see this video |
|---|
 |
14: Warehouse 3[]
| Incomplete section
This section is incomplete. You can help by adding the missing info. |
This is a very long and difficult level that requires speed, sneakiness, good timing, and orientation. This level has multiple snipers, so at almost all the points of the level, the player will be followed by sniper crosshairs. The player has to move very quickly, but also needs to avoid making careless mistakes. Good orientation is required because this level is huge.
| Click [show] to see this video |
|---|
 |
15: Research 1[]
| Incomplete section
This section is incomplete. You can help by adding the missing info. |
This level emphasizes the need avoiding lasers and precise timing. There are a lot of security guards with cutting lasers that the player must carefully navigate around. At one point, the player also needs to carefully control a green mine to navigate across cutting lasers and destroy the guards that are blocking the way. Takeshi also receives one transmission from Monty in this level.
| Click [show] to see this video |
|---|
 |
16: Research 2[]
| Incomplete section
This section is incomplete. You can help by adding the missing info. |
This level is an ultimate test on dealing with moving blocks. This level contains many small moving blocks so the player must be very careful to avoid being squashed by them.
Nitrome version[]
| Click [show] to see this video |
|---|
 |
Miniclip version[]
| Click [show] to see this video |
|---|
 |
17: Power Plant 1[]
| Incomplete section
This section is incomplete. You can help by adding the missing info. |
This level contains many enemy samurais. One tricky thing about this level is the combination of SWAT units and samurais. Sometimes a SWAT unit is hidden behind a samurai so the player is unable to kill these SWAT units since the samurais block the attack.
| Click [show] to see this video |
|---|
 |
18: Power Plant 2[]
| Incomplete section
This section is incomplete. You can help by adding the missing info. |
This is an all-around level that contains many elements of the game. The beginning part of the level involves quite a bit of tricky missile dodging. The middle part of the level involves finding and destroying force field generators while dealing with the always tricky simian units. And the end part is probably the toughest and most frustrating portion of the entire game.
The player has to navigate a green mine through a narrow chute with a large area of moving blocks, then through a large area of on-and-off laser beams, and then eventually to the generator to destroy it and disable the force field which blocks the exit. The player receives another transmission from Monty in this level, to the left of the force field generator area.
| Spoiler |
|---|
| It is also possible to beat this level with a glitch. If the player walks back into the lift, he will be taken to the next level. |
| Click [show] to see this video |
|---|
Completing level 18 via a glitch |
| Click [show] to see this video |
|---|
 |
19: Roof Top[]
| Incomplete section
This section is incomplete. You can help by adding the missing info. |
This level is the ultimate test for dealing with cutting lasers. This level contains two upwards sections and two downwards sections. The upwards sections involve moving up the area while avoiding the countless numbers of cutting Lasers. And the downwards sections involve going down huge drops with missile guns in the way. The player must be careful to control their speed while dropping to avoid over dropping.
| Click [show] to see this video |
|---|
 |
20: Lift Access Area[]
| Incomplete section
This section is incomplete. You can help by adding the missing info. |
This is a very huge and long level. The first half of the level is rather easy because Takeshi has a companion (Snowfox) alongside with you, which is very helpful in destroying guards with cutting lasers. The player must be careful not to get left behind, or else Snowfox might not be able to destroy all the enemies.
The second half of the level is very tricky, which involves the ultimate test of stealth, needing to navigate across a large area heavily guarded by sentinel guards and security lasers. In the end of the level, the player is attacked by Maxwell Merlock again, and is sent on a service lift again.
| Click [show] to see this video |
|---|
 |
21: Service Lift 2[]
| Incomplete section
This section is incomplete. You can help by adding the missing info. |
This level is the final boss battle. The difference this level has comparing to the first boss battle is that, for this boss battle, you cannot directly use ninja stars to lower his health. The boss is shielded now, which means that you have to use the green mines to attack the boss.
What makes this level very tricky is that the player has to navigate a green mine to the boss, this in the meantime while avoiding the energy balls, and needing to stand in an area unaffected by the path of the energy balls.
| Click [show] to see this video |
|---|
 |
22: The Escape[]
| Incomplete section
This section is incomplete. You can help by adding the missing info. |
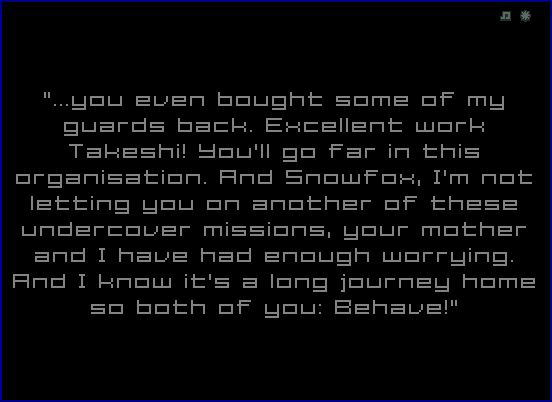
This is the epilogue level of the game. Just like the prologue, Level 0, the player is well protected by samurai guards, which could help destroy most of the enemies. The player is also protected by Snowfox who destroys all the large machines. An easy level, but the player has to be careful to keep pace, and not to get left behind.
| Click [show] to see this video |
|---|
 |
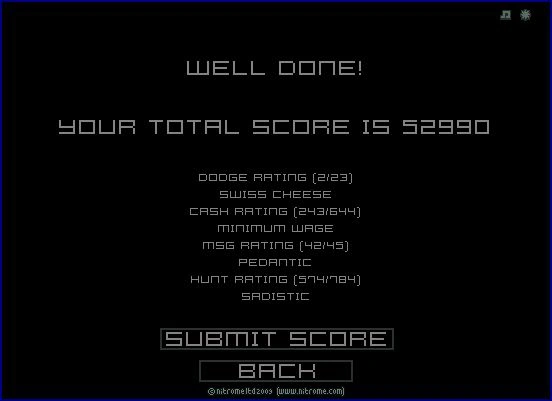
Ending[]
Enemies[]
- Drone mines - Drone mines are enemies that travel along a space, either horizontally or vertically. They explode on contact when touching the player or a ninja star. The most basic type of enemy.
- S.W.A.T. units - SWAT units are enemies that travel along a platform. They fire missiles when spotting the player. The missiles can travel diagonally. Appears from Level 1 onwards.
- Sentinel robots - Sentinel robots travel along a space, either horizontally or vertically. They constantly shoot a laser beam, and when the laser beam detects the player, it shoots missiles at the direction. These robots are usually shielded, so the player can only do damage to it when they're shooting. Appears from Level 5 onwards.
- Rotating guns - Rotating guns are guns that rotate around in a circle and shoot missiles in the direction they face. Unlike the wall mounted guns, they can be destroyed. Appears form Level 7 onwards.
- Robot sniper units - Robot sniper units are enemies that are stationary in one spot, but they use crosshairs to aim towards the player and follow the player. When the crosshairs reach the player, it shoots. The snipers use infrared detection so stealth doesn't help avoid them. The player needs to hide behind cables to avoid being seen by snipers. Appears on Levels 7 and 14.
- Green mines - Green mines are a special type of mines that the player can fire a ninja rope at them to control the mine. They are useful for accessing out-of-reach places or destroying enemies that can't be destroyed. They explode on contact with the wall or any hazards, including the player. Appears from Level 8 onwards.
- Clone scientists - Clone scientists travel along a platform. If a clone scientist sees the player, their eyes glow yellow and the alarm is triggered. Unlike most enemies, they cannot be destroyed. Appears from Level 8 onwards.
- Simian units - Simian units are cyborg monkeys which travel along a platform but can hop from one platform to another, and can walk on walls and ceilings. They are usually invisible; they are only visible when the player enables stealth. Appears on Levels 12 and 18.
- Upgraded sentinel robots - These robots travel the same way as sentinel robots. The difference is that their laser beams are cutting lasers which instantly damages the player when touching it. Since they do not shoot missiles, they cannot be destroyed unless by a user-controlled green mine. Appears from Level 12 onwards.
- Cyber samurai guards - These are identical to the samurai in Final Ninja. They are modified so the player cannot repeatedly attack from behind. They appear mainly in level 17.
Hazards[]
- Trip wire lasers - Trip wire lasers are attached to a wall, and they shoot a red laser beam. They travel either horizontally, vertically, or rotate. When it detects the player, it triggers off an alarm in which for ten seconds, enemies will start to travel towards the player. During that time, the player is not able to use stealth. Appears from Level 2 onwards.
- Hot laser beams - In some areas, there are orange laser beams, which can be either horizontal or vertical, that the player loses health upon contact with. Sometimes they switch on and off, and sometimes the beam is permanently on. Appears from Level 3 onwards, but become very commonplace Level 11 onwards.
- Shock walls - Shock walls are parts of the wall that have electricity running through it. The player loses health upon contact of it, or if the player tries to fire a rope onto the wall. Appears from Level 4 onwards.
- Wall mounted guns - Wall mounted guns are guns that cannot be destroyed because they're attached inside a wall. They fire missiles either horizontally or vertically. Appears from Level 4 onwards.
- White lab walls - Moving blocks are blocks that move around, but the player cannot fire a rope onto it because the rope would break. It can be useful to help the player travel, but it can also squash the player if the player gets underneath it. Appears from Level 5 onwards.
- Cutting lasers - Cutting lasers behave similarly to trip wire lasers, except that their laser beam is an orange beam, and the player loses health upon touching the laser beam, instead of triggering off the alarm. Appears a lot from Level 11 onwards.
Transmissions[]
")
")
")
")
")
")
Unused elements[]
Although the game files of Final Ninja Zero contain no unused content, Simon Hunter, the game's artist, put up on his website beta or unused content relating to the game. Unless otherwise noted, the content in this section is from his website.
Unused content[]
Content in this section is content that was created, but never used.
Unused background text[]
Of the few Final Ninja Zero images on Simon Hunter's website, a few of them contain a black background with light grey text in the background. Nothing like this ever appears in Final Ninja Zero.
Visible in the background is a box with the words "STERILE AREA" visible, while the other text in the background cannot be fully read, (due to being so large) only letters.
Although this text is used during regular gameplay, it is only used on platforms the player goes on, not in the background.
")
")
")
")
Unused computers[]
Behind the computer screens in the below image, there are computers in the background. These computers are never used in Final Ninja Zero, and were likely cut because they would seem out of place in levels.
Beta content[]
Content in this section is content that was included in Final Ninja Zero, but were slightly changed before release.
Beta Maxwell Merlock machine[]
The machine used by Maxwell Merlock was changed in the final version of Final Ninja Zero. The beta machine contained mines on the outer circle of the machine, along with several large wires. These mines and the wires were removed from the final model. These enormous mines may have been used in a beta version of the boss battle, although it is possible they were added just for decoration.
")
")
Beta SWAT Unit gun fire[]
SWAT Units originally had sparks come off the gun that were highly exaggerated, these sparks being very large, covering the entire front of the gun, expanding very far forward, and going down far enough to pass the enemy's arms. The gun sparks were likely toned down as they seemed incredibly unrealistic for a game such as Final Ninja Zero, which was meant to be a serious stealth game.
Alternatively, the sparks may not be gun fire but be another type of weapon, such as a flamethrower.
")
Beta simian unit[]
This image is presumably an early version of the simian unit, perhaps an possible version for this enemy among other designs, as the only difference it has from the final version is that this beta simian unit has lighter colours, a yellow eye instead of orange, and no shading on the image.
In a tutorial Simon Hunter did on creating pixel art, he went through various stages of creating pixel art, this beta simian unit looking as though it was at stage 5.
")
Beta power orb machine[]
The power orb machine that distributes power orbs, this machine was slightly changed from its final version. The early version had wires at the bottom left and bottom top right of the machine, furthermore, the upper middle opening in the machine, this used to be rectangular, but in the final version of Final Ninja Zero, is jagged.
.png "BetaPowerOrb(FN0).png (5 KB)")
")
Content uncertain[]
Content in this section consists of variations of content that was used in Final Ninja; some of this content being a variation that was not used in Final Ninja Zero.
Beta/unused sentinel unit[]
Discovered on Simon Hunter's website is an image of a beta sentinel unit. This unit appears as every regular sentinel unit, with the exception that it lacks a gun and has a green light instead of an orange light.
It is possible that this is a beta design for multiple enemies, as it may be a beta design for the general sentinel robot look, a beta version of the regular sentinel robots, a beta version of the upgraded sentinel robots (which could possibly explain the green light, as upgraded sentinel robots lack any sort of light), or possibly a cut version of sentinel robot, as this sentinel robot lacks any weapon.
With the exception of the green light, it looks exactly like a regular sentinel robot.
")
")
")
Unused/beta sentinel unit[]
Found on Simon Hunter's website is an image of a regular sentinel unit that has an orange light (this light being the colour of the light of usual sentinel robots). Unusual about the sentinel is not only that it lacks a gun behind it, but instead, has two wall mounted guns on each side.
This may have been the intended design of regular sentinel robots, if this is so, it likely would have been cut for looking too menacing for a regular security robot. Alternatively, it may be a cut version of a sentinel unit, likely one that would have been suited for combat and not much for looking around for intruders.
If this is true, then it would have likely not been able to be spawned into levels when the alarm is set off (due to its size), and may have been able to rotate its guns. If this is in fact true, it was likely cut due to its size and limited use in levels, as very few levels of Final Ninja Zero take place in rooms with aggressive enemies that try to kill the player.
What is most likely is that this image may be a fusion of two wall mounted guns and a sentinel body with an orange light, if this is true, it may either be an attempted recreation of a very early design for a sentinel which Simon Hunter did not have, or an attempt by Simon Hunter to make a new type of sentinel, this supported by how the left wall mounted gun is placed to close to the left of the sentinel, while the right wall mounted gun is placed close enough to the sentinel to make it look as though it was meant to be connected.
")
Glitches[]
Skipping level 18 glitch[]
If Takeshi exits the lift to level eighteen then quickly reenters it, he will be transported to the next level. This means that the player can access level 19 without ever having to complete level 18. Strangely, this only works for level 18, not any other level.
High scores buttons glitch[]
Sometimes, the high scores buttons will be broken and display strange characters.

101st score[]
By pressing the the left button (the one that moves he scores back ten scores) on the high scores fast enough, it is possible to see the 101st score.
")
Awards[]
| Site/Event | Year | Contest | Prize | Outcome |
|---|---|---|---|---|
| Jay is Games | 2010 | Best of Casual Gameplay 2009 | Best Platform game (Browser games) | Nominated - second place (11.18% of all votes) |
Trivia[]
- Final Ninja Zero is Nitrome's first released prequel.
- At the start of level 18, players can complete the level by re-entering the same area where they first started from. Nitrome has not fixed this, and it remains one of the most well known Nitrome glitches, though it's arguable that it's more likely to be an Easter egg due to the difficulty of the level instead of a glitch because of it remaining unfixed.
- It is unknown how Takeshi is able to communicate with Monty from Dirk Valentine, due to the fact that Dirk Valentine's games take place in the year 1897 and higher and both Final Ninja games take place in the future (beyond 2020).
- The Final Ninja series is inspired by the Metal Gear series, and as such has some references and Easter eggs to the Metal Gear series.
- Akuma's design in Final Ninja Zero bears a striking resemblance to Big Boss from the Metal Gear series.
- The Simian units look similar to Gray Fox, a character and boss from Metal Gear Solid.
- The SWAT Unit enemies look similar in design to the Genome soldiers from Metal Gear Solid.
- Maxwell Merlock may draw some inspiration from Psycho Mantis, a boss in Metal Gear Solid that possesses psychic abilities much like Merlock.
- The sound effect for when Takeshi receives messages is similar to the sound effect used when Solid Snake receives calls on his Codec throughout the Metal Gear Solid series.
- The Sushi lunches found in the Final Ninja games may be a reference to the rations found in the Metal Gear Solid series, which replenish health when eaten.
- Takeshi donning a disguise of a clone scientist may be a reference to Metal Gear Solid 3: Snake Eater, in which Naked Snake had to disguise himself as a scientist to infiltrate an enemy base.
References[]
- ↑ Cosmic Cannon HTML5 was released on June 9th and was the latest HTML5 release at the time. Avalanche was publicly present on Poki.com on August 12th according to this page crawl on Wayback Machine, the earliest know date it was known to be present on the website. The page also contains a link to Final Ninja 0.
| v • d • eFinal Ninja series | |
|---|---|
| General | Final Ninja • Final Ninja Zero • Final Ninja series • Final Ninja (arena) • Ninja suit • City • Dr. Boshi's base • Merlock Food Pharma |
| Heroes | Takeshi • Lady Snow Fox • Akuma |
| Villains | Dr. Boshi • Maxwell Merlock • Akuma |
| Enemies | S.W.A.T. units • Sentinel robots • Sniper (Final Ninja) • Sniper machines • Robot sniper units • Rotating guns • Mines (Final Ninja) • Drone mines • Blue mines • Green mines • Clone scientists • Simian units • Upgraded sentinel robots • Basic cyber guards • Laser guards • Cyber samurai • Cyborg samurai |
| Pick Ups | Money • Sushi lunch • Power orbs |
| Interactive objects | Lift • Generator • Force fields |
| Hazards | Tripwire lasers • Alarm • Spawners • Electricity • Lasers (Final Ninja) • Green electricity beams • Hot laser beams • Shock walls • Wall mounted guns • Cutting lasers • White lab walls • Spotlights • Blue wall mounted guns |
| Bosses | Maxwell Merlock • Defence Robot Alpha • Defence Robot Zero |